Building toys
Even though he’s always excelled in primary school, I wanted to work on our 11-year-old son’s ability to follow written and visual instructions before he moved up to high school. We wanted to make this fun for him, and for some time we’ve encouraged him to bake delicious desserts for the family with his 8-year-old sister (under adult supervision of course). It was a revelation and so many other skills are learned in the process: reading, motor skills, the science of how ingredients bind and react and the mathematics of scaling up or down a recipe.
We wanted to build on this and also move away from the instant gratification of getting something sweet a short time after following the instructions. So, for the last few months we’ve been trying out building toys that take several hours to construct, or use more complex skills, and rely on visual instructions as well as written ones. We tried Meccano, an adult Lego set and an electronic project from EIGHT Innovation – that required wiring and soldering skills. Here’s how our experiences went with all three.
Lego: Captain Rex Helmet
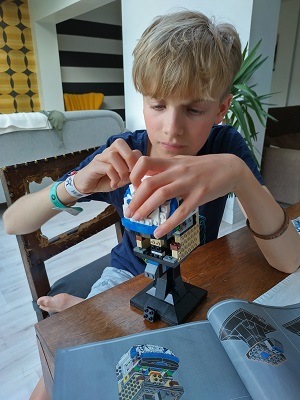 Of all the products we tried out, this was the one I was sure Harrison would struggle with the most. Not because he doesn’t understand the concept of Lego – he’s previously built a couple of their more basic products – but because the age rating on this was 18. I enquired with Lego if this product would be okay for an 11-year-old and they informed me that lots of children Harrison’s age built them with their parent’s supervision, so I decided to give it a whirl.
I needn’t have worried because from the moment it was unboxed Harrison wouldn’t let me do anything, he wouldn’t let me open any of the 5 bags with the 854 pieces in and wouldn’t let me give any tips or advice. “I can do it,” he insisted, and for the most part he actually could. He whizzed through about 99% of the build himself over a period of two weeks – taking half an hour each night before bed. I only recall having to help out on three occasions for the entire build, and these were very minor alterations. Problems did crop up from time to time, but it was great to see him rewind and go through his own problem-solving process to see where he’d gone wrong; then rebuild correctly.
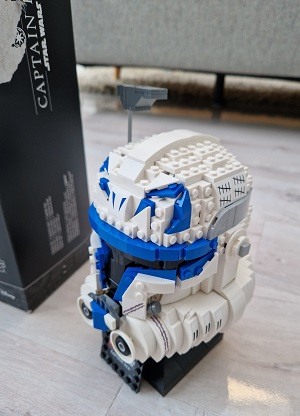 As far as building toys go, I was extremely impressed. There are very distinct stages to this helmet and where Harrison did need to rewind it was never more than a few steps, such is the way the project is layered. I can definitely see us investing in more Lego sets because the sense of accomplishment after several sittings was really rewarding to see and the patience and persistence of doing this over a longer period added to this.
As a family we don’t know anything about Captain Rex from the Star Wars series – though I’m guessing he’s a storm trooper as the helmet is so similar. So, we have no real affection for either Star Wars or Lego as brands, but this was a great project to work on and Harrison would like to build more Lego projects. The final result looks great, and there are quite a lot of small parts that move subtly to add to the aesthetics. It’s now sitting proudly on Harrison’s desk, next to his gaming monitor. Who knows he might even develop an interest in Star Wars now, to go along with his newfound interest in Lego.
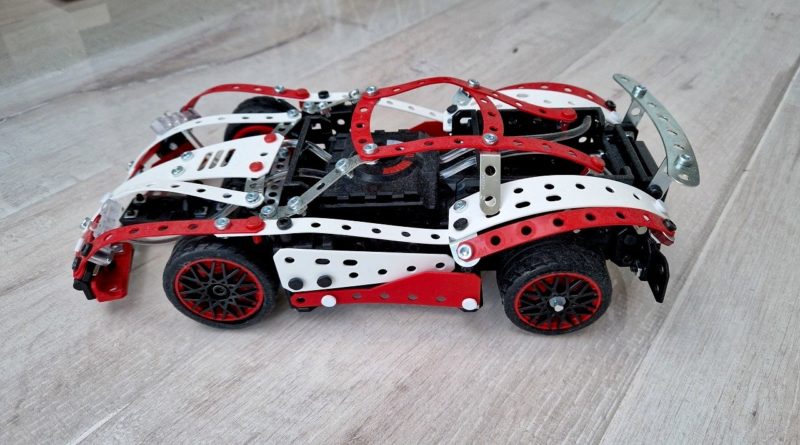
Meccano 25-in-1 Motorized Supercar
I settled on Meccano a couple of months ago, after realising that Harrison had no idea how to hold or use a spanner, countersunk screws, or a screwdriver properly. I can’t believe I’d gone through 11 years without realising this, perhaps because it’s one of those skills I just took for granted. So, as well as building on his ability to read instructions and problem solve, I thought we could start some skills in manipulating basic tools too. As with Lego there are many different Meccano kits available, and they range from basic sets aimed at 5+ years to more complex sets aimed at older children. We settled on the 25 in 1 Motorised Supercar set aimed at kids aged 10+ and priced at £35.00.
As with the Lego this set took us several hours to build, and we completed it over a similar period of around two weeks’ worth of half hour sessions. Again, it was great to watch Harrison’s confidence with building grow after he learned how to use the tools properly. The first session was pretty frustrating, because of how he was holding the tools and there was more than one argument when I tried to show him properly. But once he’d mastered this he was in his element. There was no real need for me to intervene, after the first session and I just sat back and watched him focus on assembling the car.
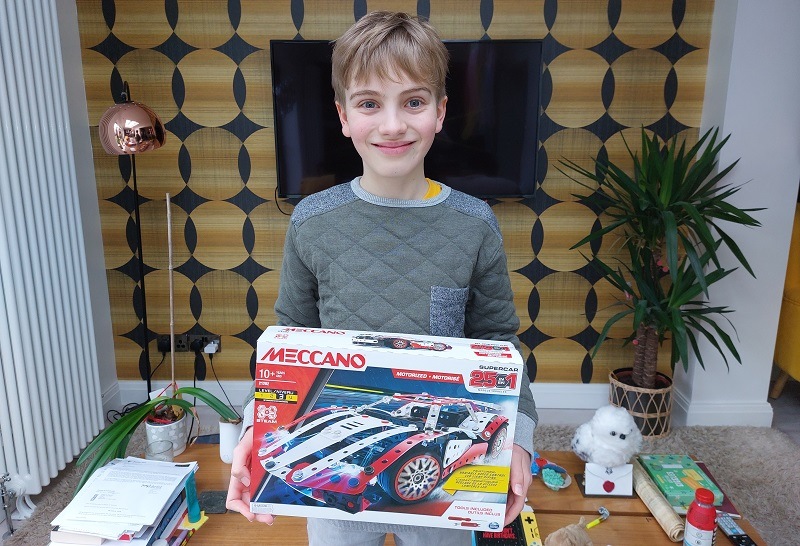 After each build he’d proudly show his mum and sister how the car had come on that day and he’d plan how far he wanted to get the following day, with me doing my best to set reasonable expectations for each session. He was fascinated too how a collection of 347 nuts, bolts and metal bars could be used to construct the finished article.
The instructions were clear, detailed and easy to follow, with no real mistakes being made by Harrison throughout the building process. The only difficulty we did run into is that we never put batteries in the compartment before we completed the construction, and then realised that once it was built it needed to be taken apart by quite a number of steps to put batteries in, or change them. After a quick search online I noticed that a few other people were pointing out the peculiarity of this design. Still, we just added it to our problem solving skills and reverse engineered the car until we fit the batteries, then rebuilt it from there.
The great thing about this is that there are so many other designs from the one product, which means endless hours of construction fun. We’ve only built the one model so far, because he likes the finished article so much that he doesn’t want to take it apart again. But I do plan to get him through some of the other 25 models at some stage in the future, most likely when the batteries run out. For now though, I’m happy he’s learned how to use a spanner and screwdriver properly.
Eight- Retro Arcade
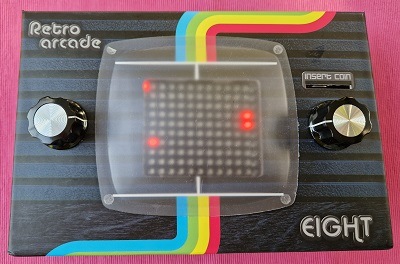 I’m giving an honourable mention to this “toy”, which is more of an electronics mini-project, because Harrison had great fun building it. The reason for this is because it introduced him to the world of soldering. The project is simple enough and involves soldering a couple of potentiometers to a circuit board and attaching the rest of the parts together. It didn’t take us long – less than an hour – and the instructions were more aimed at older children in my opinion, but the look of delight on Harrison’s face as he learned the new skill was well worth the £17.99 asking price. I’d like to have taken a picture but since he’s 11 years old, very new to soldering and the iron gets to over 300 degrees I thought it prudent to keep both my hands very close to his to ensure there were no accidents.
Once it was built we had a perfectly functional LED version of the classic PONG game from Atari, which was essentially the first video game ever made. Both Harrison and his eight year old sister seem to like the game and have switched it on and played it a few times since we completed the project. It’s made of cardboard and more of a novelty than the other two, but it’s well worth trying if you’d like to get your child into electronics.






Fabulous kits for young people to realise that, with patience, they can create interesting and complex items.
We are at entry level with this type of building toy, our lad is 13 but has severe learning difficulties, we’re using lego presently but hope he will have the understanding to move on to more difficult kits soon.
Wow! Well done, Harrison! Putting things together is a skill we should all have but many don’t.
Eight- Retro Arcade looks amazing, my Grandson would enjoy trying soldering
Great kits! I love building toys even now in my 40s especially Lego!